从零到点亮:一次完整的嵌入式Rust(ESP32-C3)环境搭建与硬件故常排查实录
Table of Contents
从零到点亮:一次完整的嵌入式Rust(ESP32-C3)环境搭建与硬件故常排查实录
本文档详尽记录了参与 Second State 的“Learning Rust Camp S2”训练营时,在macOS环境下为ESP32-C3开发板搭建嵌入式Rust开发环境的全过程。内容从安装基础工具链(Rust, espup)开始,逐步深入到项目模板的生成与配置。文章的重点与核心价值在于,真实再现了在执行 cargo run 烧录程序时,遇到Error: espflash::no_serial这一典型错误的完整排查思路——从最初的软件和驱动检查,到最终定位并解决物理硬件(USB数据线)问题的曲折经历。这不仅是一份操作指南,更是一份宝贵的嵌入式开发“避坑”与解决问题的实战笔记。本文旨在为有同样目标的开发者,提供一份详尽的路线图和一份宝贵的‘避坑’指南。
本文是一份在macOS上为ESP32-C3开发板搭建嵌入式Rust环境的综合实战指南。文章覆盖了从安装Rust、esp-rs工具链到使用esp-generate创建项目的完整流程。核心部分详细记录了解决espflash::no_serial(无法找到串口)错误的完整诊断过程:从验证驱动、检查系统硬件报告,到最终通过更换USB数据线成功解决问题。本文旨在为嵌入式Rust初学者提供一份从入门到解决典型硬件连接问题的“端到端”实战参考。
环境安装实操
安装 Rust
curl --proto '=https' --tlsv1.2 -sSf https://sh.rustup.rs | sh
更多详情请参考:https://www.rust-lang.org/learn/get-started
验证安装
rustc --version
rustc 1.89.0 (29483883e 2025-08-04)
cargo --version
cargo 1.89.0 (c24e10642 2025-06-23)
安装 espup
cargo install --locked espup
验证安装
espup --version
espup 0.15.1
安装必要的工具链
espup install
问题
espup install
[info]: Installing the Espressif Rust ecosystem
[warn]: Failed to get latest Xtensa Rust version: HTTP GET Error: GitHub API returned status code: 401 Unauthorized
Error: espup::toolchain::http_error

  × HTTP GET Error: GitHub API returned status code: 401 Unauthorized
解决
设置 GitHub 个人访问令牌
-
生成 Token:
- 访问 GitHub Tokens 页面,创建一个新 Token(勾选
public_repo权限)。
- 访问 GitHub Tokens 页面,创建一个新 Token(勾选
-
配置环境变量:
export GITHUB_TOKEN="你的Token"
espup install
(Windows 用
set GITHUB_TOKEN=你的Token)
实操
export GITHUB_TOKEN=ghp_6xxx

espup install
[info]: Installing the Espressif Rust ecosystem
[info]: Checking Rust installation
[info]: Installing RISC-V Rust targets ('riscv32imc-unknown-none-elf', 'riscv32imac-unknown-none-elf' and 'riscv32imafc-unknown-none-elf') for 'stable' toolchain
[info]: Installing Xtensa Rust 1.88.0.0 toolchain
[info]: Installing Xtensa LLVM
[info]: Installing GCC (xtensa-esp-elf)
[info]: Creating symlink between '/Users/qiaopengjun/.rustup/toolchains/esp/xtensa-esp32-elf-clang/esp-19.1.2_20250225/esp-clang/lib' and '/Users/qiaopengjun/.espup/esp-clang'
[info]: Installing 'rust' component for Xtensa Rust toolchain
[info]: Installing 'rust-src' component for Xtensa Rust toolchain
[info]: All downloads complete
[info]: Installation successfully completed!
[00:04:23] ######################################## 131713848/131713848 rust.tar.xz download complete
 To get started, you need to set up some environment variables by running: '. /Users/qiaopengjun/export-esp.sh'
 This step must be done every time you open a new terminal.
     See other methods for setting the environment in https://esp-rs.github.io/book/installation/riscv-and-xtensa.html#3-set-up-the-environment-variables
更多详情请参考:https://narukara.github.io/rust-on-esp-book-zh-cn/installation/riscv-and-xtensa.html
安装 espflash 工具
espflash 是一个专门用于 Espressif ESP 系列芯片(如 ESP32、ESP8266)的串口烧录工具
cargo install --locked espflash
它和单纯的flash烧录工具还有点不一样 有一些额外的逻辑。
单纯的flash烧录工具会让你指定从什么地址开始烧录。
但是espflash就没有这个选项。
安装 ldproxy
cargo install --locked ldproxy
更多详情请参考:https://narukara.github.io/rust-on-esp-book-zh-cn/installation/std-requirements.html
安装cargo-generate
Rust 生态的 通用项目模板工具,适用于任何 Rust 项目(如库、CLI、Web 后端等)。
通过 Git 模板仓库(如 esp-idf-template)快速生成项目结构,支持交互式问答配置。
cargo install cargo-generate
验证安装
cargo generate -V
cargo generate-generate 0.23.4
安装 esp-generate
专为 ESP 裸机(no_std)开发设计的模板工具,由 esp-rs 团队维护。
模板生成工具,用于创建针对 Espressif 芯片的 no_std 应用程序。
cargo install esp-generate
验证安装
esp-generate -V
esp-generate 0.5.0
项目开发实操
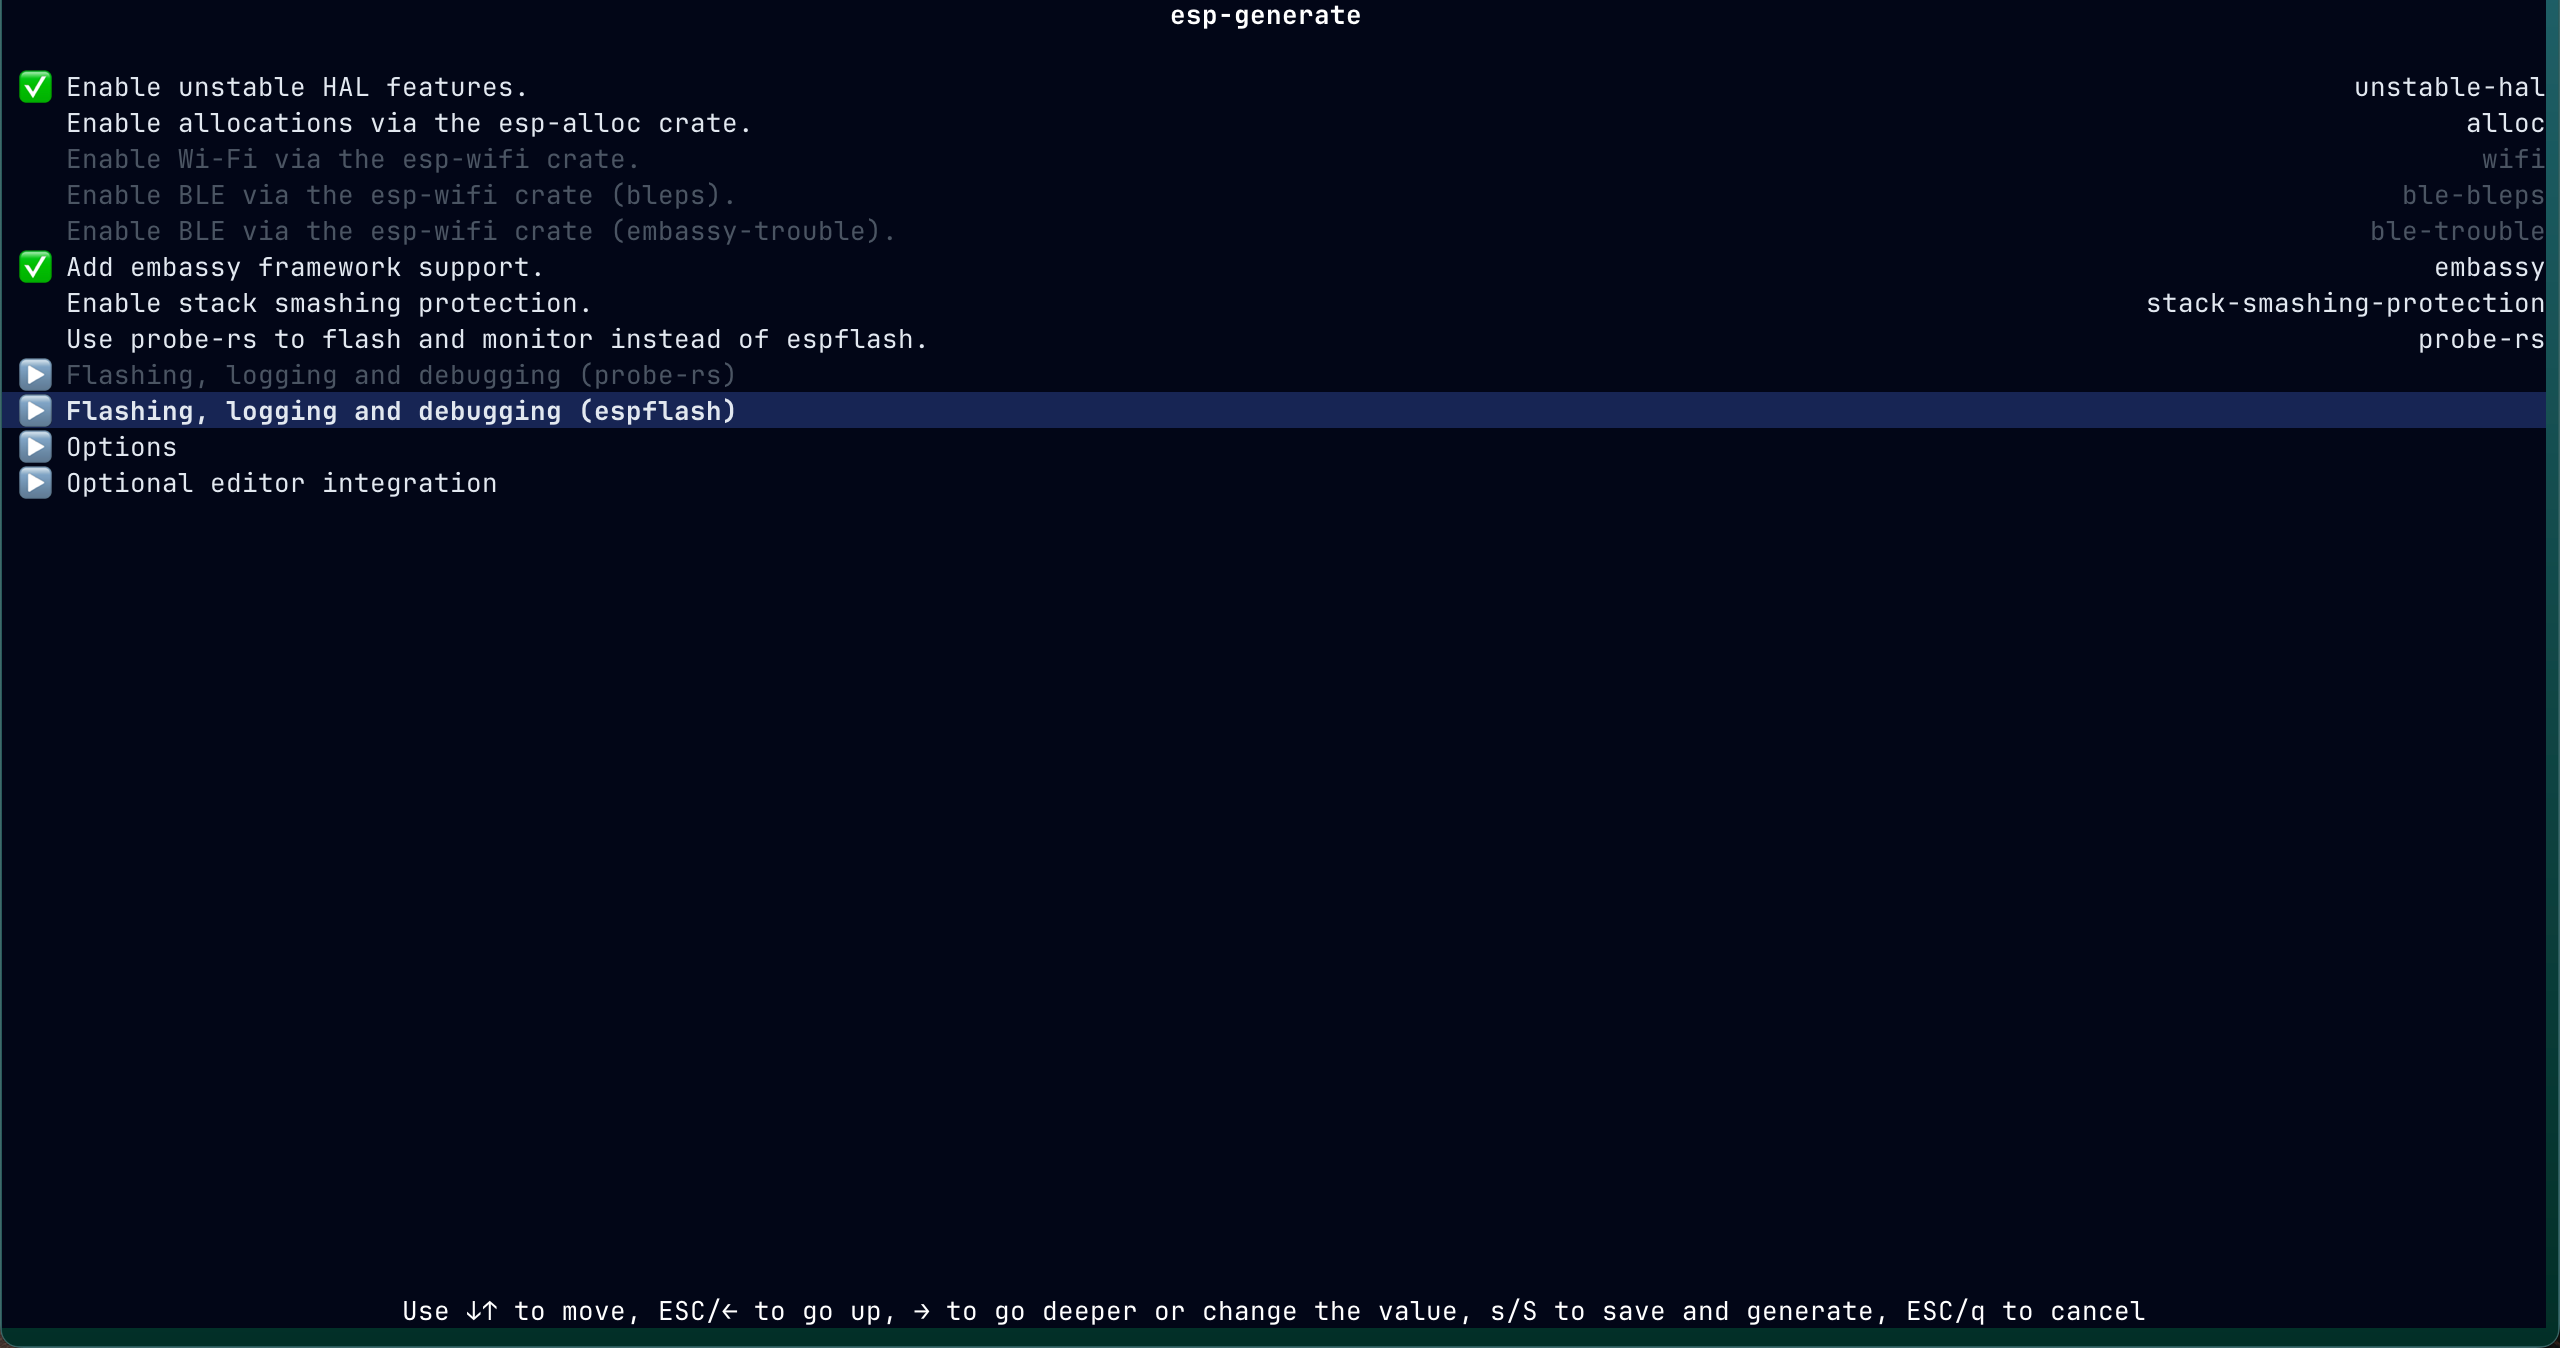
使用 esp-generate 工具生成一个 ESP32-C3 的嵌入式 Rust 模板项目
通过交互式模板生成一个针对 ESP32-C3 芯片的 no_std 嵌入式 Rust 项目**
esp-generate --chip esp32c3 esp32c3_hello_world
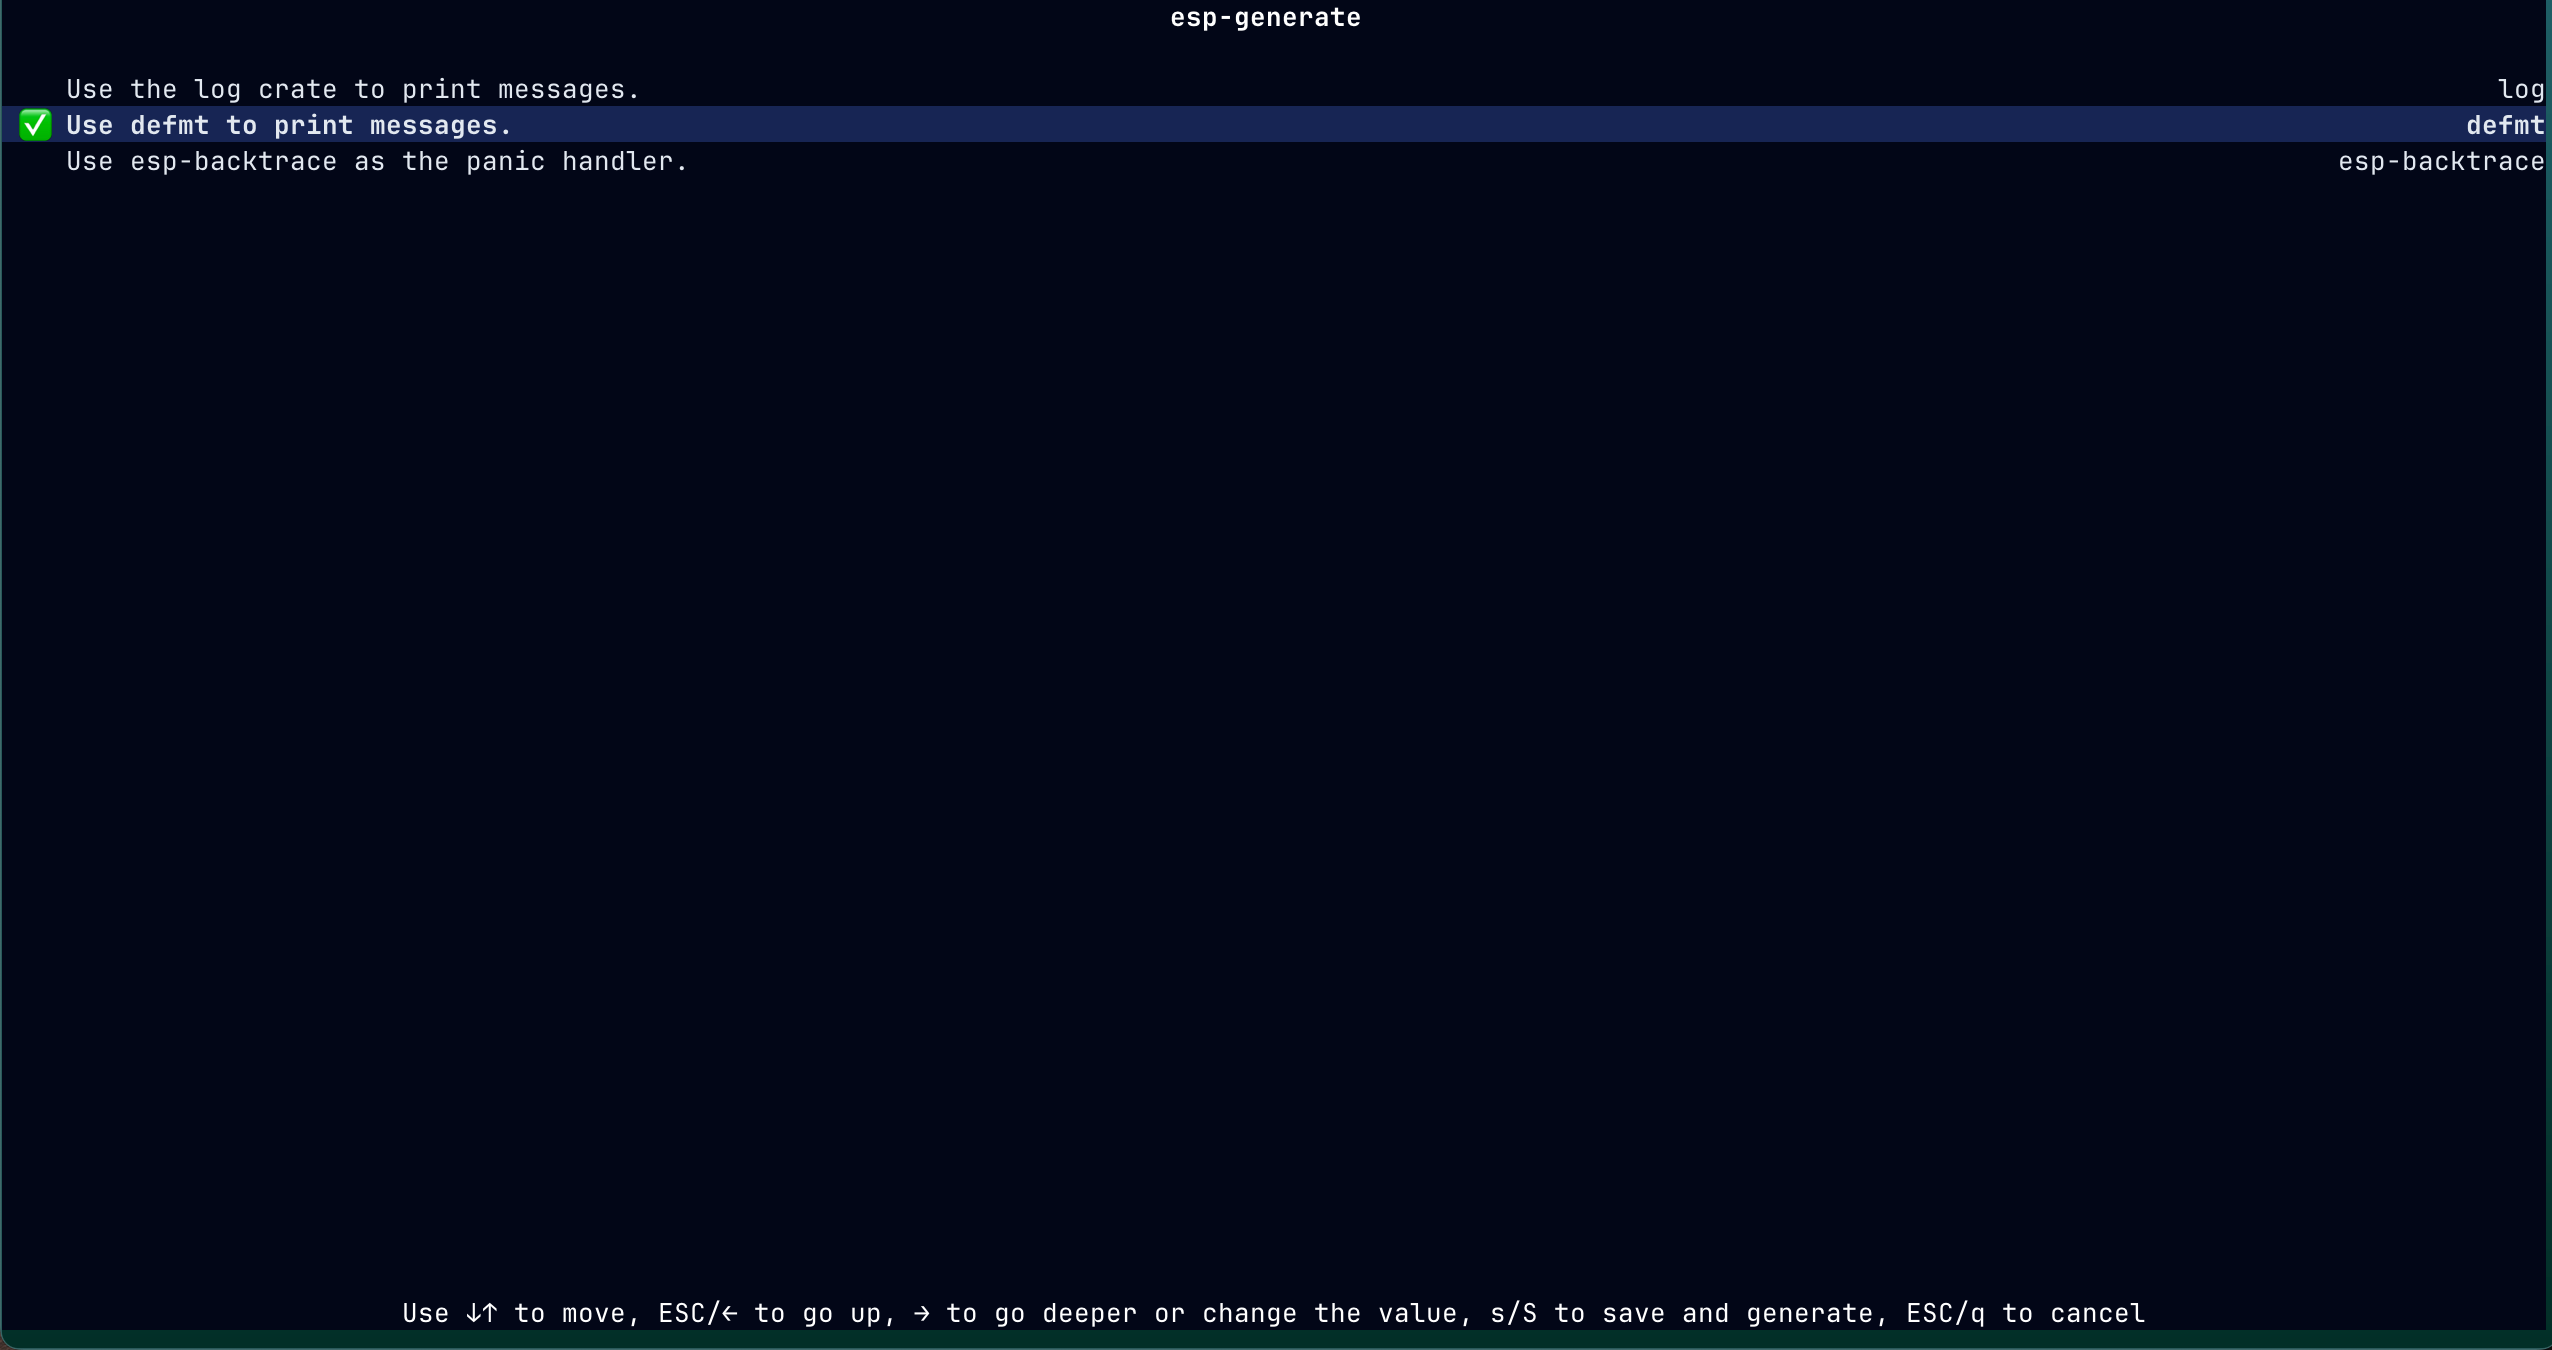
Selected options: --chip esp32c3 -o unstable-hal -o embassy -o defmt
Checking installed versions
🆗 Rust (stable): 1.89.0
🆗 espflash: 4.0.1
❌ probe-rs (not found - see https://probe.rs/docs/getting-started/installation/ for how to install)
生成项目失败,安装probe-rs解决。
安装 probe-rs工具包
# 方式一
curl --proto '=https' --tlsv1.2 -LsSf https://github.com/probe-rs/probe-rs/releases/latest/download/probe-rs-tools-installer.sh | sh

# 方式二
cargo install probe-rs-tools --locked
实操安装并验证
cargo install probe-rs-tools --locked

probe-rs --version
probe-rs 0.29.1 (git commit: crates.io)

cargo-flash -V
cargo flash 0.29.1

cargo-embed -V
cargo embed 0.29.1
当你安装 probe-rs-tools 时,你实际上安装了以下几个重要的可执行程序:
probe-rs: 一个功能强大的主命令行工具,可以用来烧录、擦除、调试芯片等。cargo-flash: 一个 Cargo 的子命令,让你能用cargo flash --chip <CHIP_NAME>这样更便捷的命令来烧录你的项目。cargo-embed: 另一个 Cargo 子命令,功能更强大,集成了烧录、日志输出(RTT 或 semihosting)和调试器(GDB server)于一体,提供一站式的嵌入式开发体验。
所以,你安装的确实“不只是 probe-rs”,而是整个 probe-rs 工具链的全家桶。
更多详情请参考:https://probe.rs/docs/getting-started/installation/
删除项目重新生成项目
rm -rf esp32c3_hello_world/

esp-generate --chip esp32c3 esp32c3_hello_world
Selected options: --chip esp32c3 -o unstable-hal -o embassy -o defmt

Checking installed versions
🆗 Rust (stable): 1.89.0
🆗 espflash: 4.0.1
🆗 probe-rs: 0.29.1
完美,成功啦!
切换到项目目录并用编辑器打开项目
cd esp32c3_hello_world/

cc # open -a cursor .
编译项目
esp32c3_hello_world on master [?] via 🦀 1.89.0 on 🐳 v28.2.2 (orbstack)
➜ cargo build --release
查看项目目录
esp32c3_hello_world on master [?] is 📦 0.1.0 via 🦀 1.89.0 on 🐳 v28.2.2 (orbstack) took 47.6s
➜ tree . -L 6 -I "docs|target"
.
├── build.rs
├── Cargo.lock
├── Cargo.toml
├── rust-toolchain.toml
└── src
├── bin
│ └── main.rs
└── lib.rs
3 directories, 6 files
删除lib.rs文件
esp32c3_hello_world on master [?] is 📦 0.1.0 via 🦀 1.89.0 on 🐳 v28.2.2 (orbstack)
➜ rm -rf src/lib.rs
注意:目前不需要删除,后面按需添加即可。
更新Cargo.toml 文件
[package]
edition = "2021"
name = "esp32c3_hello_world"
rust-version = "1.86"
version = "0.1.0"

[[bin]]
name = "esp32c3_hello_world"
path = "./src/bin/main.rs"
test = false
bench = false

[dependencies]
defmt = "1.0.1"
esp-bootloader-esp-idf = { version = "0.2.0", features = ["esp32c3"] }
esp-hal = { version = "=1.0.0-rc.0", features = [
    "defmt",
    "esp32c3",
    "unstable",
] }

critical-section = "1.2.0"
embassy-executor = { version = "0.7.0", features = [
    "defmt",
    "task-arena-size-20480",
] }
embassy-time = { version = "0.4.0", features = ["defmt"] }
esp-hal-embassy = { version = "0.9.0", features = ["defmt", "esp32c3"] }
esp-println = { version = "0.15.0", features = ["defmt-espflash", "esp32c3"] }
static_cell = "2.1.1"


[profile.dev]
# Rust debug is too slow.
# For debug builds always builds with some optimization
opt-level = "s"

[profile.release]
codegen-units = 1        # LLVM can perform better optimizations using a single thread
debug = 2
debug-assertions = false
incremental = false
lto = 'fat'
opt-level = 's'
overflow-checks = false
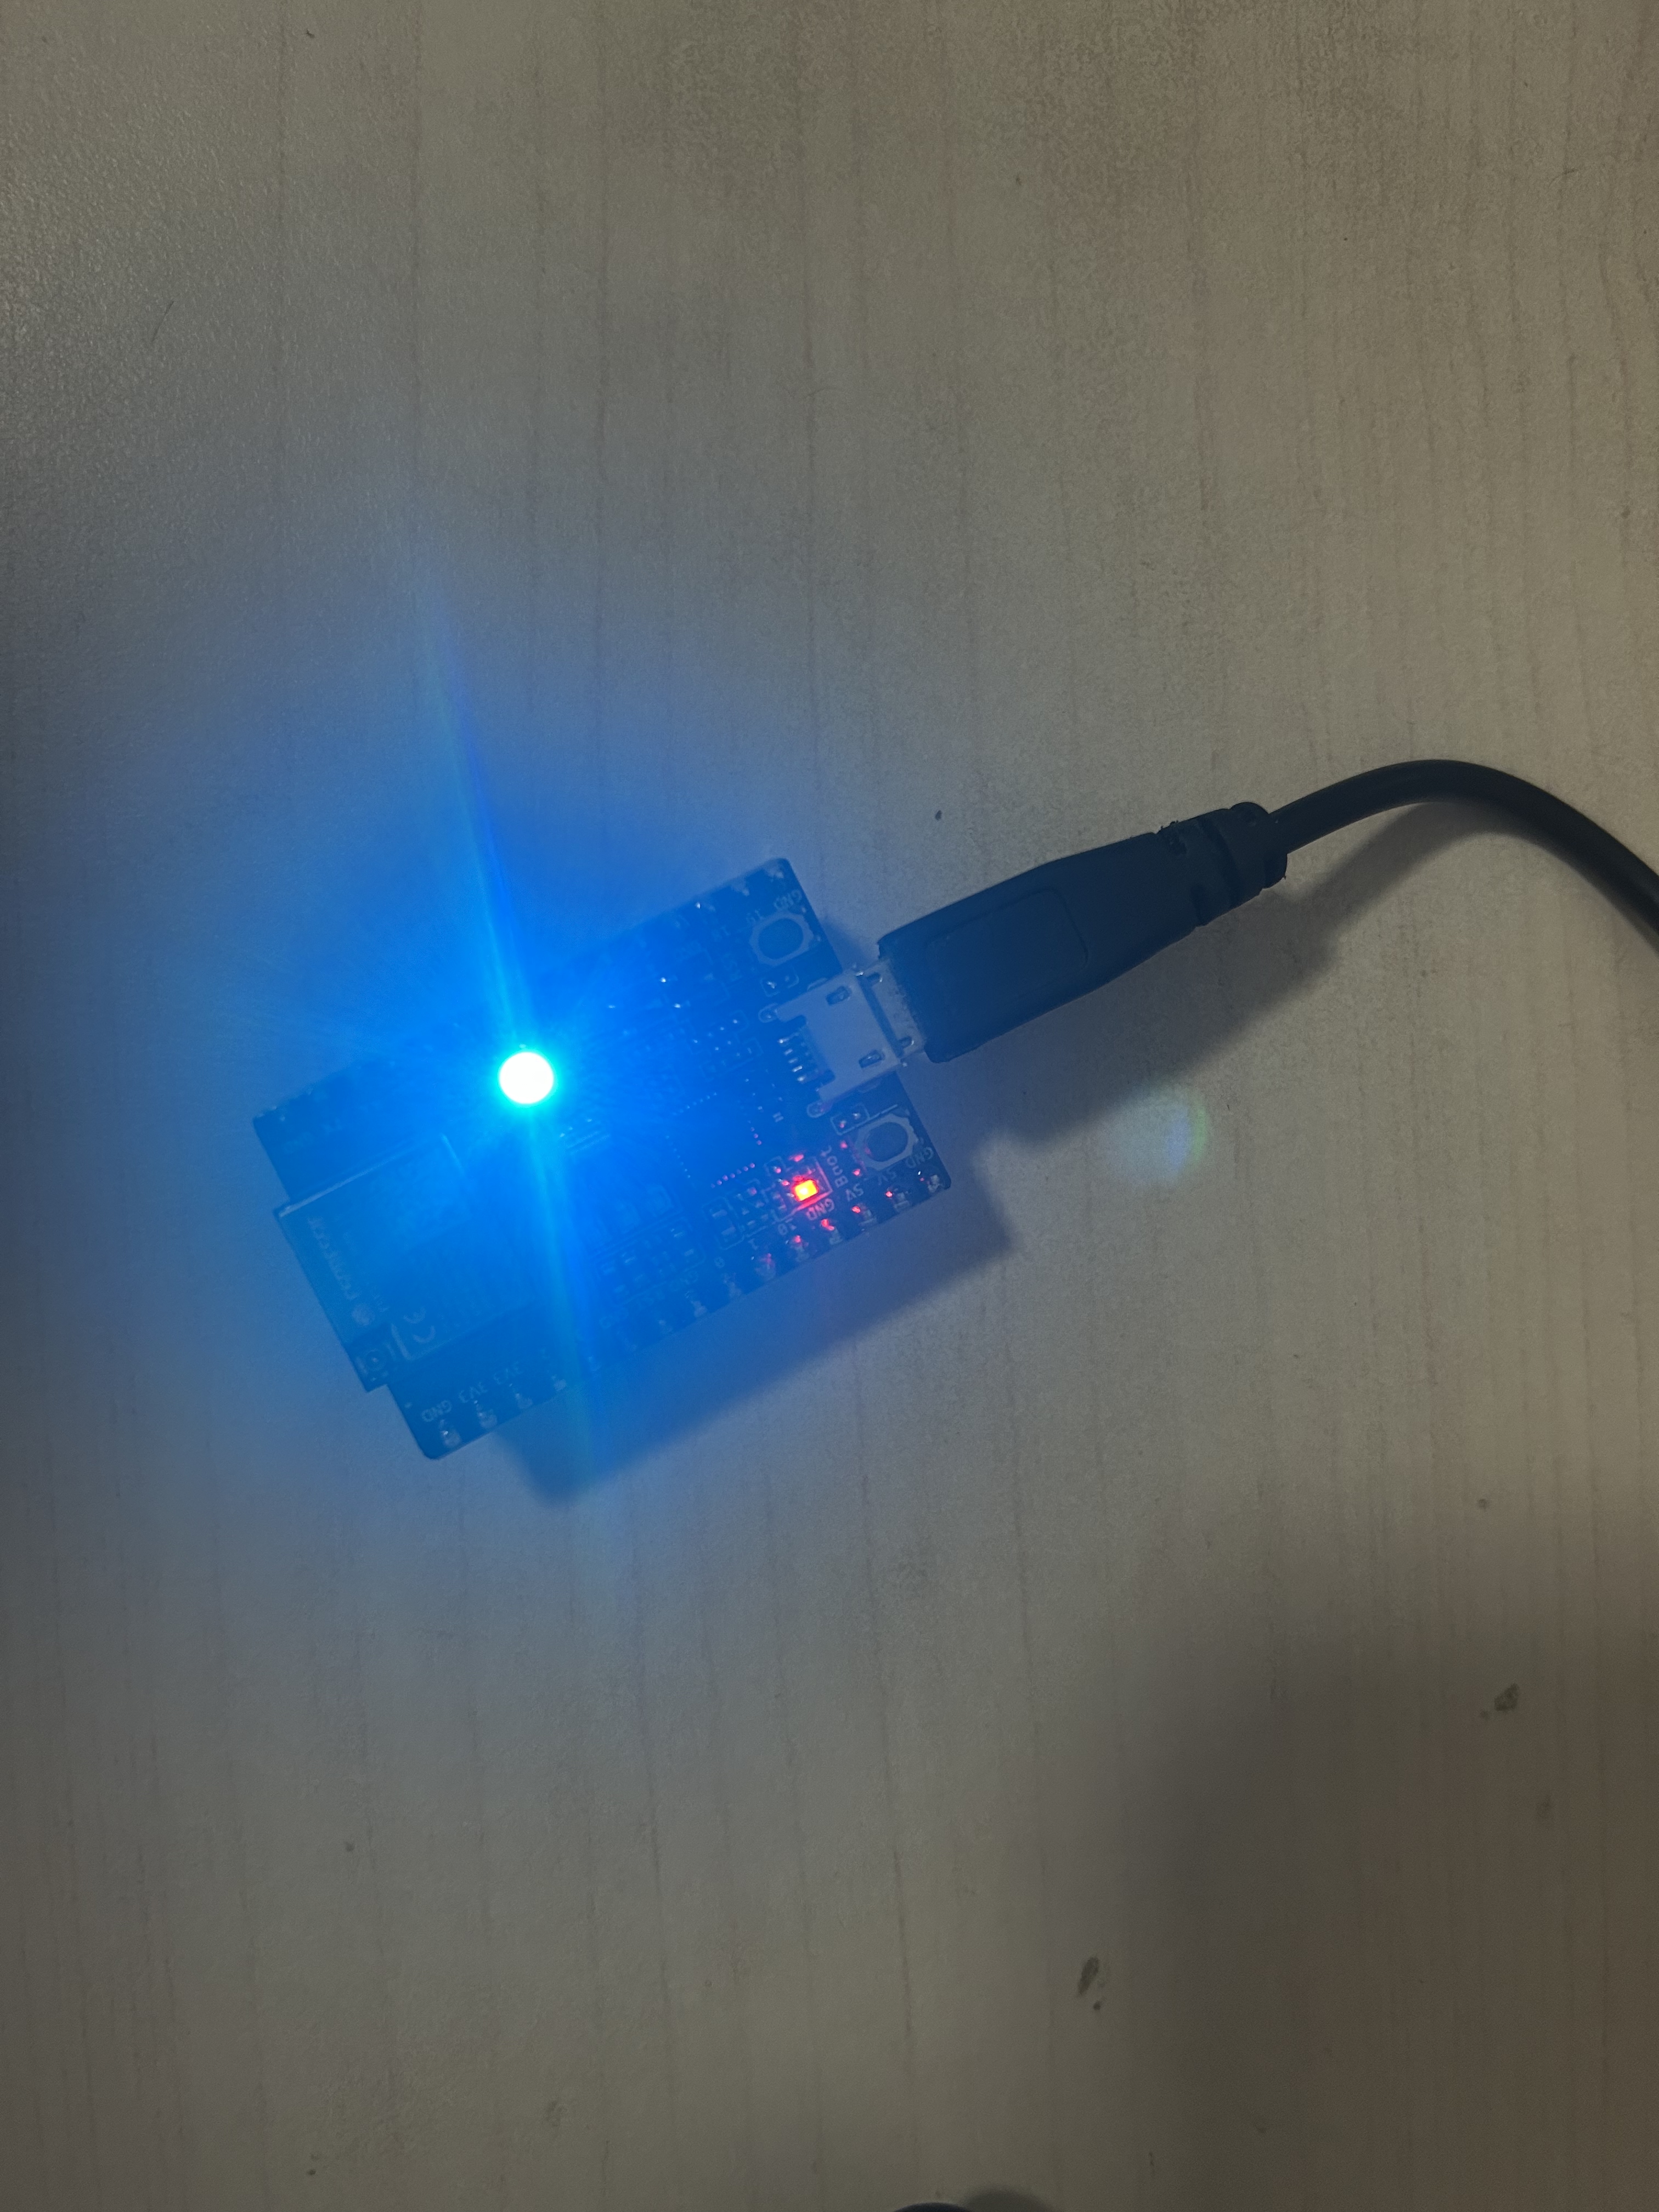
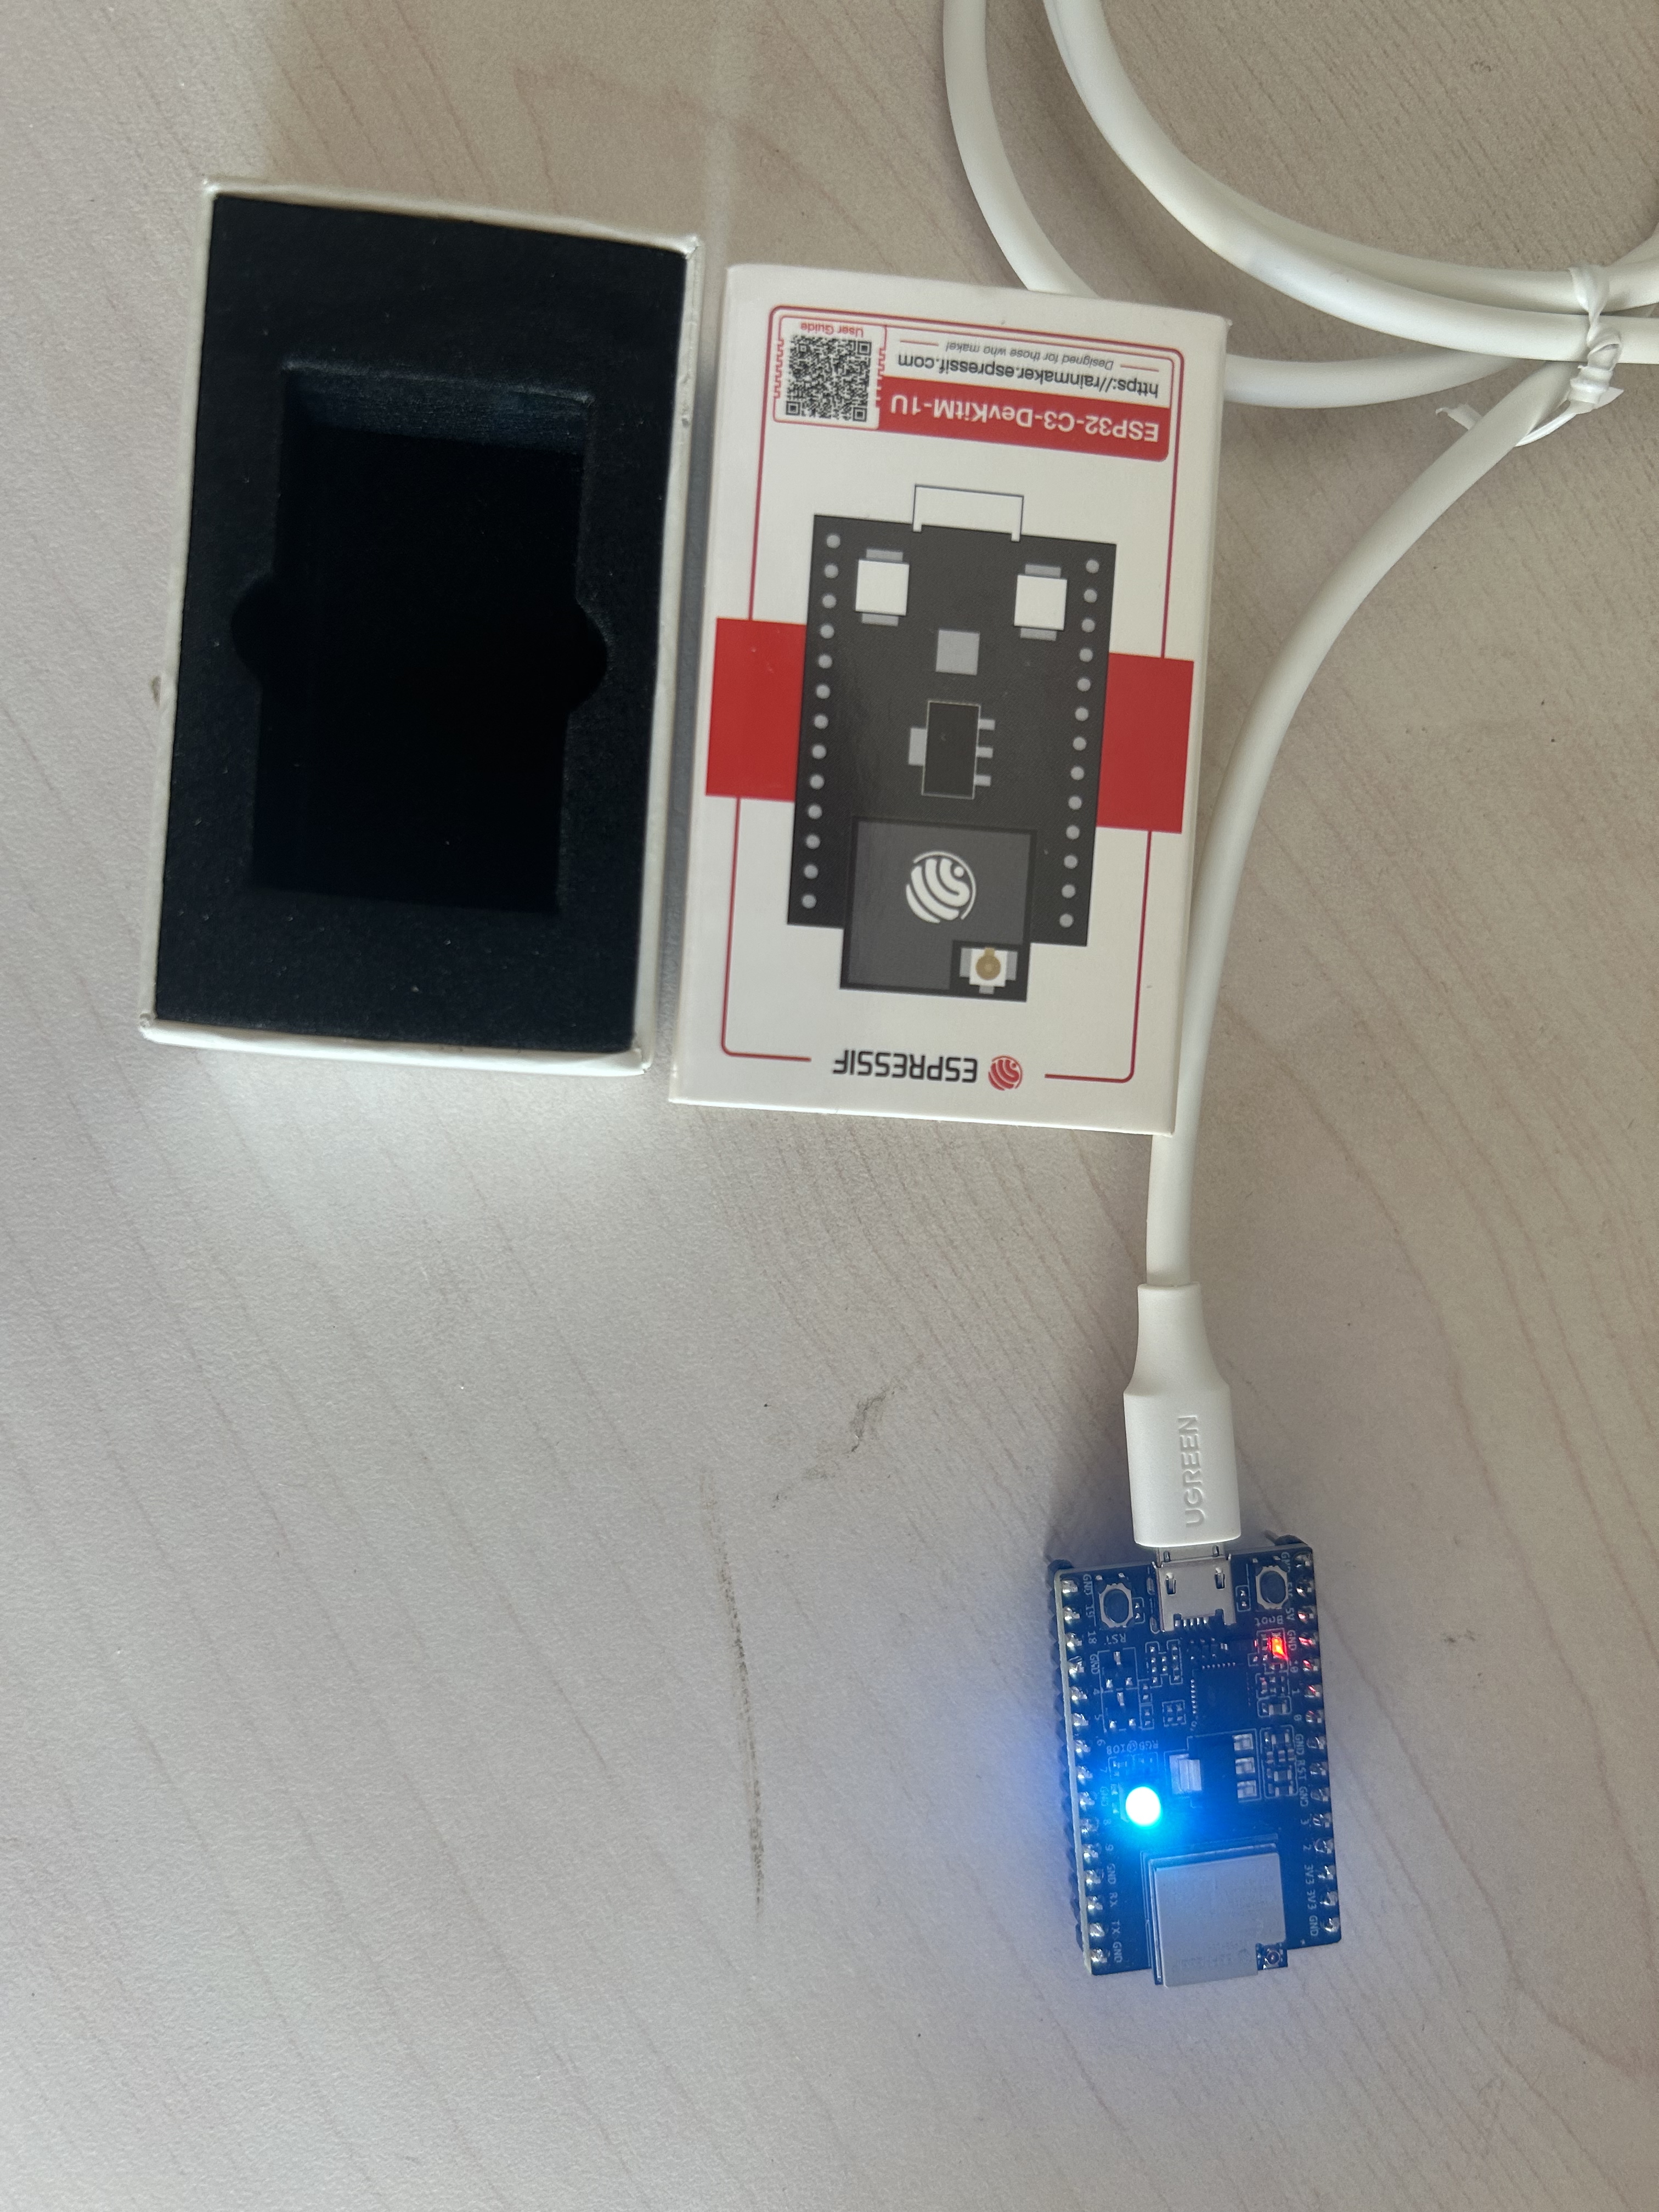
连接开发板
编译运行
esp32c3_hello_world on master [?] is 📦 0.1.0 via 🦀 1.89.0
➜ cargo run --release
Finished `release` profile [optimized + debuginfo] target(s) in 0.21s
Running `espflash flash --monitor --chip esp32c3 --log-format defmt target/riscv32imc-unknown-none-elf/release/esp32c3_hello_world`
Error: espflash::no_serial
× No serial ports could be detected
help: Make sure you have connected a device to the host system. If the device is connected but not listed, try using the `--list-all-ports` flag.

运行失败!
查看设备
ls /dev/tty.*
/dev/tty.Bluetooth-Incoming-Port /dev/tty.debug-console

未找到开发板!
解决问题一:安装驱动
开发板需要安装由 Silicon Labs (芯科科技) 提供的 CP210x VCP 驱动程序
请直接执行下一步:
- 前往官方下载页面:
- 下载并安装Mac驱动:
- 找到并下载名为
CP210x VCP Mac OSX Driver的文件。
- 找到并下载名为
- 授权并重启:
- 安装后,在
通用 > 登录项与扩展 > 驱动程序扩展中允许该驱动。 - 重启你的Mac电脑。
- 安装后,在
更多详情请查看:https://www.silabs.com/software-and-tools/usb-to-uart-bridge-vcp-drivers?tab=downloads
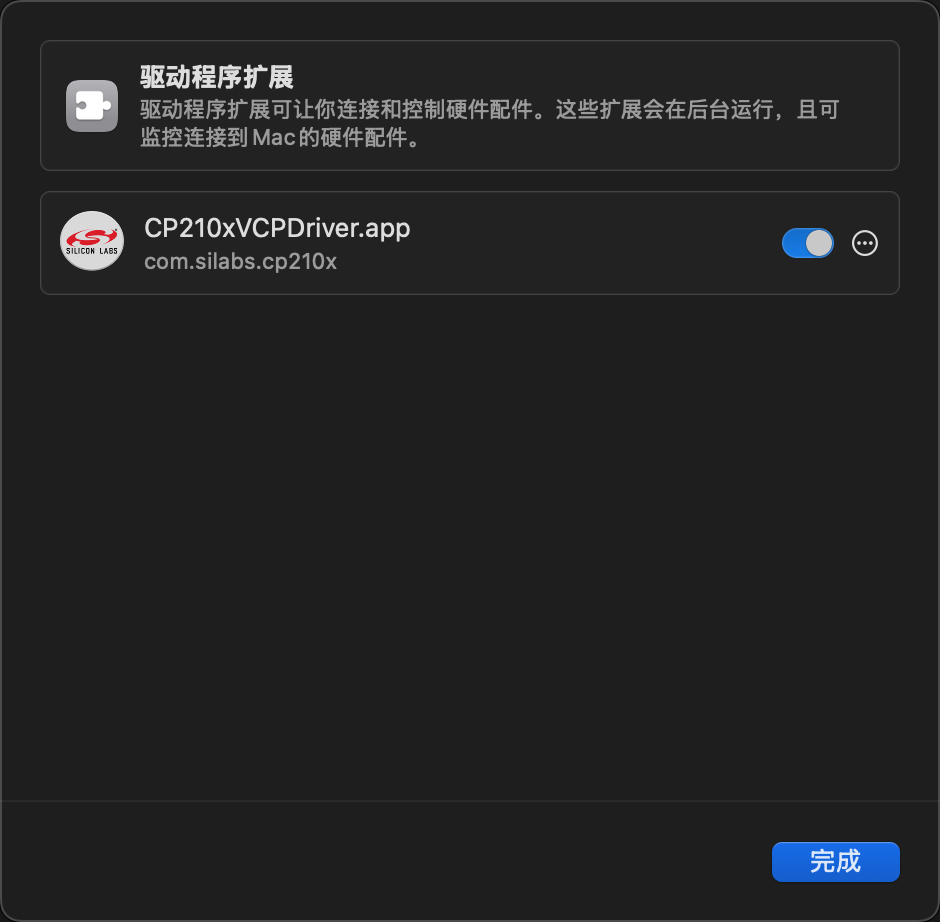
找到允许这个驱动在后台运行的开关,将它打开(那个蓝色的开关表示“已启用”)。
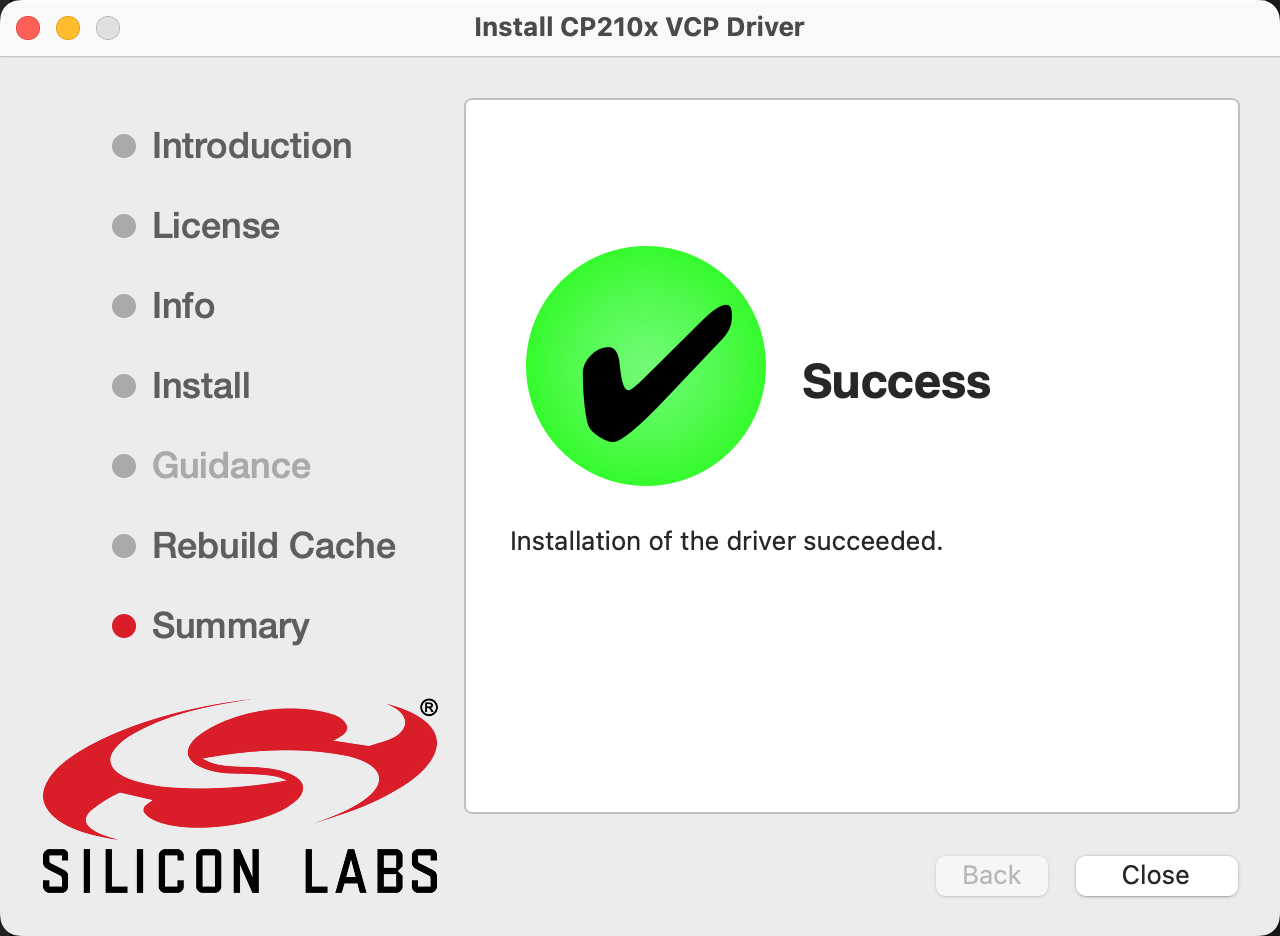
驱动已经安装成功,再次尝试运行还是失败。
esp32c3_hello_world on master [?] is 📦 0.1.0 via 🦀 1.89.0
➜ cargo run --release
Finished `release` profile [optimized + debuginfo] target(s) in 0.30s
Running `espflash flash --monitor --chip esp32c3 --log-format defmt target/riscv32imc-unknown-none-elf/release/esp32c3_hello_world`
Error: espflash::no_serial
× No serial ports could be detected
help: Make sure you have connected a device to the host system. If the device is connected but not listed, try using the `--list-all-ports` flag.
查看验证驱动是否已激活
systemextensionsctl list
1 extension(s)
--- com.apple.system_extension.driver_extension (Go to 'System Settings > General > Login Items & Extensions > Driver Extensions' to modify these system extension(s))
enabled active teamID bundleID (version) name [state]
* * 52444FG85C com.silabs.cp210x (6.0.3/1) com.silabs.cp210x [activated enabled]
验证了驱动在系统里是激活状态 (systemextensionsctl list 的结果)。
硬件扫描查看
system_profiler SPUSBDataType
USB:

    USB 3.1 Bus:

      Host Controller Driver: AppleT8112USBXHCI

        USB3.1 Hub:

          Product ID: 0x0626
          Vendor ID: 0x05e3  (Genesys Logic, Inc.)
          Version: 6.56
          Speed: Up to 5 Gb/s
          Manufacturer: GenesysLogic
          Location ID: 0x01200000 / 1
          Current Available (mA): 900
          Current Required (mA): 0
          Extra Operating Current (mA): 0

            AX88179A:

              Product ID: 0x1790
              Vendor ID: 0x0b95  (ASIX Electronics Corporation)
              Version: 2.00
              Serial Number: 0068DA73A2559E
              Speed: Up to 5 Gb/s
              Manufacturer: ASIX
              Location ID: 0x01240000 / 3
              Current Available (mA): 900
              Current Required (mA): 184
              Extra Operating Current (mA): 0

        USB2.1 Hub:

          Product ID: 0x0610
          Vendor ID: 0x05e3  (Genesys Logic, Inc.)
          Version: 6.56
          Speed: Up to 480 Mb/s
          Manufacturer: GenesysLogic
          Location ID: 0x01100000 / 2
          Current Available (mA): 500
          Current Required (mA): 100
          Extra Operating Current (mA): 0

    USB 3.1 Bus:

      Host Controller Driver: AppleT8112USBXHCI

    USB 3.1 Bus:

      Host Controller Driver: AppleT8112USBXHCI

        USB3.0 Hub             :

          Product ID: 0x0817
          Vendor ID: 0x2109  (VIA Labs, Inc.)
          Version: 6.44
          Serial Number: 000000000
          Speed: Up to 5 Gb/s
          Manufacturer: VIA Labs, Inc.
          Location ID: 0x02200000 / 2
          Current Available (mA): 900
          Current Required (mA): 0
          Extra Operating Current (mA): 0

            USB3.0-CRW:

              Product ID: 0x0306
              Vendor ID: 0x0bda  (Realtek Semiconductor Corp.)
              Version: 7.00
              Serial Number: 60000719201300000
              Speed: Up to 5 Gb/s
              Manufacturer: Generic
              Location ID: 0x02230000 / 5
              Current Available (mA): 900
              Current Required (mA): 800
              Extra Operating Current (mA): 0

            Elements SE SSD:

              Product ID: 0x266e
              Vendor ID: 0x1058  (Western Digital Technologies, Inc.)
              Version: 60.83
              Serial Number: 323330394558343031383931
              Speed: Up to 5 Gb/s
              Manufacturer: WD
              Location ID: 0x02210000 / 4
              Current Available (mA): 900
              Current Required (mA): 896
              Extra Operating Current (mA): 0
              Media:
                Elements SE SSD:
                  Capacity: 1 TB (1,000,204,886,016 bytes)
                  Removable Media: No
                  BSD Name: disk6
                  Logical Unit: 0
                  Partition Map Type: GPT (GUID Partition Table)
                  S.M.A.R.T. status: Verified
                  USB Interface: 0
                  Volumes:
                    EFI:
                      Capacity: 209.7 MB (209,715,200 bytes)
                      File System: MS-DOS FAT32
                      BSD Name: disk6s1
                      Content: EFI
                      Volume UUID: 0E239BC6-F960-3107-89CF-1C97F78BB46B
                    disk6s2:
                      Capacity: 1 TB (999,995,129,856 bytes)
                      BSD Name: disk6s2
                      Content: Apple_APFS

        USB2.0 Hub             :

          Product ID: 0x2817
          Vendor ID: 0x2109  (VIA Labs, Inc.)
          Version: 6.44
          Serial Number: 000000000
          Speed: Up to 480 Mb/s
          Manufacturer: VIA Labs, Inc.
          Location ID: 0x02100000 / 1
          Current Available (mA): 500
          Current Required (mA): 0
          Extra Operating Current (mA): 0

            USB 2.0 Hub:

              Product ID: 0x0101
              Vendor ID: 0x1a40  (TERMINUS TECHNOLOGY INC.)
              Version: 1.11
              Speed: Up to 480 Mb/s
              Location ID: 0x02130000 / 3
              Current Available (mA): 500
              Current Required (mA): 100
              Extra Operating Current (mA): 0

            USB-C 7-in-1 Multiport Adapter:

              Product ID: 0x009a
              Vendor ID: 0x050d  (Belkin Corporation)
              Version: 0.01
              Serial Number: 0000000000000001
              Speed: Up to 480 Mb/s
              Manufacturer: Belkin International
              Location ID: 0x02150000 / 6
              Current Available (mA): 500
              Current Required (mA): 100
              Extra Operating Current (mA): 0
用最底层的硬件扫描命令 (system_profiler SPUSBDataType),发现硬件本身就没有被系统检测到。
猜测问题出在物理连接的链条上。怀疑是数据线有问题。
解决问题二:购买 USB 数据线 (A 转 Micro-B)
重新购买 USB 数据线 (A 转 Micro-B)连接。
列出设备文件
ls /dev/tty.*
/dev/tty.Bluetooth-Incoming-Port /dev/tty.SLAB_USBtoUART          /dev/tty.debug-console           /dev/tty.usbserial-2140
成功啦,你现在看到的 ls /dev/tty.* 的输出,就是我们一直期待的成功画面。
/dev/tty.SLAB_USBtoUART/dev/tty.usbserial-2140
这两个新出现的设备,就是你的Mac电脑已经成功识别了你的ESP32开发板的铁证!
tty.SLAB_USBtoUART 是 Silicon Labs 驱动创建的官方端口名。tty.usbserial-xxxx 是 macOS 系统给USB串口设备起的一个通用名。它们通常指向同一个物理设备。
重新编译运行
esp32c3_hello_world on master [?] is 📦 0.1.0 via 🦀 1.89.0
➜ cargo build --release
Finished `release` profile [optimized + debuginfo] target(s) in 0.25s
esp32c3_hello_world on master [?] is 📦 0.1.0 via 🦀 1.89.0
➜ cargo run --release
Finished `release` profile [optimized + debuginfo] target(s) in 0.17s
Running `espflash flash --monitor --chip esp32c3 --log-format defmt target/riscv32imc-unknown-none-elf/release/esp32c3_hello_world`
[2025-08-10T06:47:20Z INFO ] Detected 2 serial ports
[2025-08-10T06:47:20Z INFO ] Ports which match a known common dev board are highlighted
[2025-08-10T06:47:20Z INFO ] Please select a port
❯ /dev/cu.usbserial-2140 - CP2102N USB to UART Bridge Controller
/dev/cu.SLAB_USBtoUART - CP2102N USB to UART Bridge Controller
这两个端口其实都指向你同一个ESP32开发板。
/dev/cu.SLAB_USBtoUART:这是 Silicon Labs 驱动程序自己创建的、比较官方的设备名。/dev/cu.usbserial-2140:这是 macOS 系统给这个USB串口设备起的一个通用的、带序列号的名字。
它们本质上是通往同一个设备的“两条路”。通常情况下,走哪条路都能到达目的地。
你看到的那个箭头符号 ❯,是命令行程序里的光标,表示它已经默认帮你选好了第一项 /dev/cu.usbserial-2140。
espflash 工具非常智能,当它检测到多个可能的端口时,会自动将它认为最合适的那个作为默认选项。在这种情况下,你只需要按回车键确认它的选择即可。
我们直接按 回车键 (Enter) 就可以了。
按 回车键 (Enter) 继续运行
esp32c3_hello_world on master [?] is 📦 0.1.0 via 🦀 1.89.0
➜ cargo run --release
Finished `release` profile [optimized + debuginfo] target(s) in 0.17s
Running `espflash flash --monitor --chip esp32c3 --log-format defmt target/riscv32imc-unknown-none-elf/release/esp32c3_hello_world`
[2025-08-10T06:47:20Z INFO ] Detected 2 serial ports
[2025-08-10T06:47:20Z INFO ] Ports which match a known common dev board are highlighted
[2025-08-10T06:47:20Z INFO ] Please select a port
[2025-08-10T06:52:37Z INFO ] Serial port: '/dev/cu.usbserial-2140'
[2025-08-10T06:52:37Z INFO ] Connecting...
[2025-08-10T06:52:37Z INFO ] Using flash stub
Chip type: esp32c3 (revision v0.3)
Crystal frequency: 40 MHz
Flash size: 4MB
Features: WiFi, BLE
MAC address: 10:91:a8:40:ce:b8
App/part. size: 75,712/4,128,768 bytes, 1.83%
[00:00:01] [========================================] 13/13 0x0 Verifying... OK!
[00:00:00] [========================================] 1/1 0x8000 Verifying... OK!
[00:00:02] [========================================] 10/10 0x10000 Verifying... OK! [2025-08-10T06:52:42Z INFO ] Flashing has completed!
Commands:
CTRL+R Reset chip
CTRL+C Exit
ESP-ROM:esp32c3-api1-20210207
Build:Feb 7 2021
rst:0x1 (POWERON),boot:0xc (SPI_FAST_FLASH_BOOT)
SPIWP:0xee
mode:DIO, clock div:2
load:0x3fcd5820,len:0x1574
load:0x403cc710,len:0xc34
load:0x403ce710,len:0x2f64
entry 0x403cc71a
I (32) boot: ESP-IDF v5.4.1-426-g3ad36321ea 2nd stage bootloader
I (32) boot: compile time Apr 24 2025 15:55:47
I (32) boot: chip revision: v0.3
I (33) boot: efuse block revision: v1.1
I (37) boot.esp32c3: SPI Speed : 40MHz
I (41) boot.esp32c3: SPI Mode : DIO
I (45) boot.esp32c3: SPI Flash Size : 4MB
I (48) boot: Enabling RNG early entropy source...
I (53) boot: Partition Table:
I (55) boot: ## Label Usage Type ST Offset Length
I (62) boot: 0 nvs WiFi data 01 02 00009000 00006000
I (68) boot: 1 phy_init RF data 01 01 0000f000 00001000
I (75) boot: 2 factory factory app 00 00 00010000 003f0000
I (81) boot: End of partition table
I (84) esp_image: segment 0: paddr=00010020 vaddr=3c000020 size=00dfch ( 3580) map
I (93) esp_image: segment 1: paddr=00010e24 vaddr=3fc80994 size=00118h ( 280) load
I (99) esp_image: segment 2: paddr=00010f44 vaddr=40380000 size=00994h ( 2452) load
I (107) esp_image: segment 3: paddr=000118e0 vaddr=00000000 size=0e738h ( 59192)
I (127) esp_image: segment 4: paddr=00020020 vaddr=42010020 size=0277ch ( 10108) map
I (130) boot: Loaded app from partition at offset 0x10000
I (130) boot: Disabling RNG early entropy source...
[INFO ] Embassy initialized! (esp32c3_hello_world src/bin/main.rs:35)
[INFO ] Hello world! (esp32c3_hello_world src/bin/main.rs:41)
[INFO ] Hello world! (esp32c3_hello_world src/bin/main.rs:41)
[INFO ] Hello world! (esp32c3_hello_world src/bin/main.rs:41)
[INFO ] Hello world! (esp32c3_hello_world src/bin/main.rs:41)
[INFO ] Hello world! (esp32c3_hello_world src/bin/main.rs:41)
[INFO ] Hello world! (esp32c3_hello_world src/bin/main.rs:41)
[INFO ] Hello world! (esp32c3_hello_world src/bin/main.rs:41)
[INFO ] Hello world! (esp32c3_hello_world src/bin/main.rs:41)
[INFO ] Hello world! (esp32c3_hello_world src/bin/main.rs:41)
[INFO ] Hello world! (esp32c3_hello_world src/bin/main.rs:41)
[INFO ] Hello world! (esp32c3_hello_world src/bin/main.rs:41)
[INFO ] Hello world! (esp32c3_hello_world src/bin/main.rs:41)
[INFO ] Hello world! (esp32c3_hello_world src/bin/main.rs:41)
[INFO ] Hello world! (esp32c3_hello_world src/bin/main.rs:41)
[INFO ] Hello world! (esp32c3_hello_world src/bin/main.rs:41)
[INFO ] Hello world! (esp32c3_hello_world src/bin/main.rs:41)
[INFO ] Hello world! (esp32c3_hello_world src/bin/main.rs:41)
[INFO ] Hello world! (esp32c3_hello_world src/bin/main.rs:41)
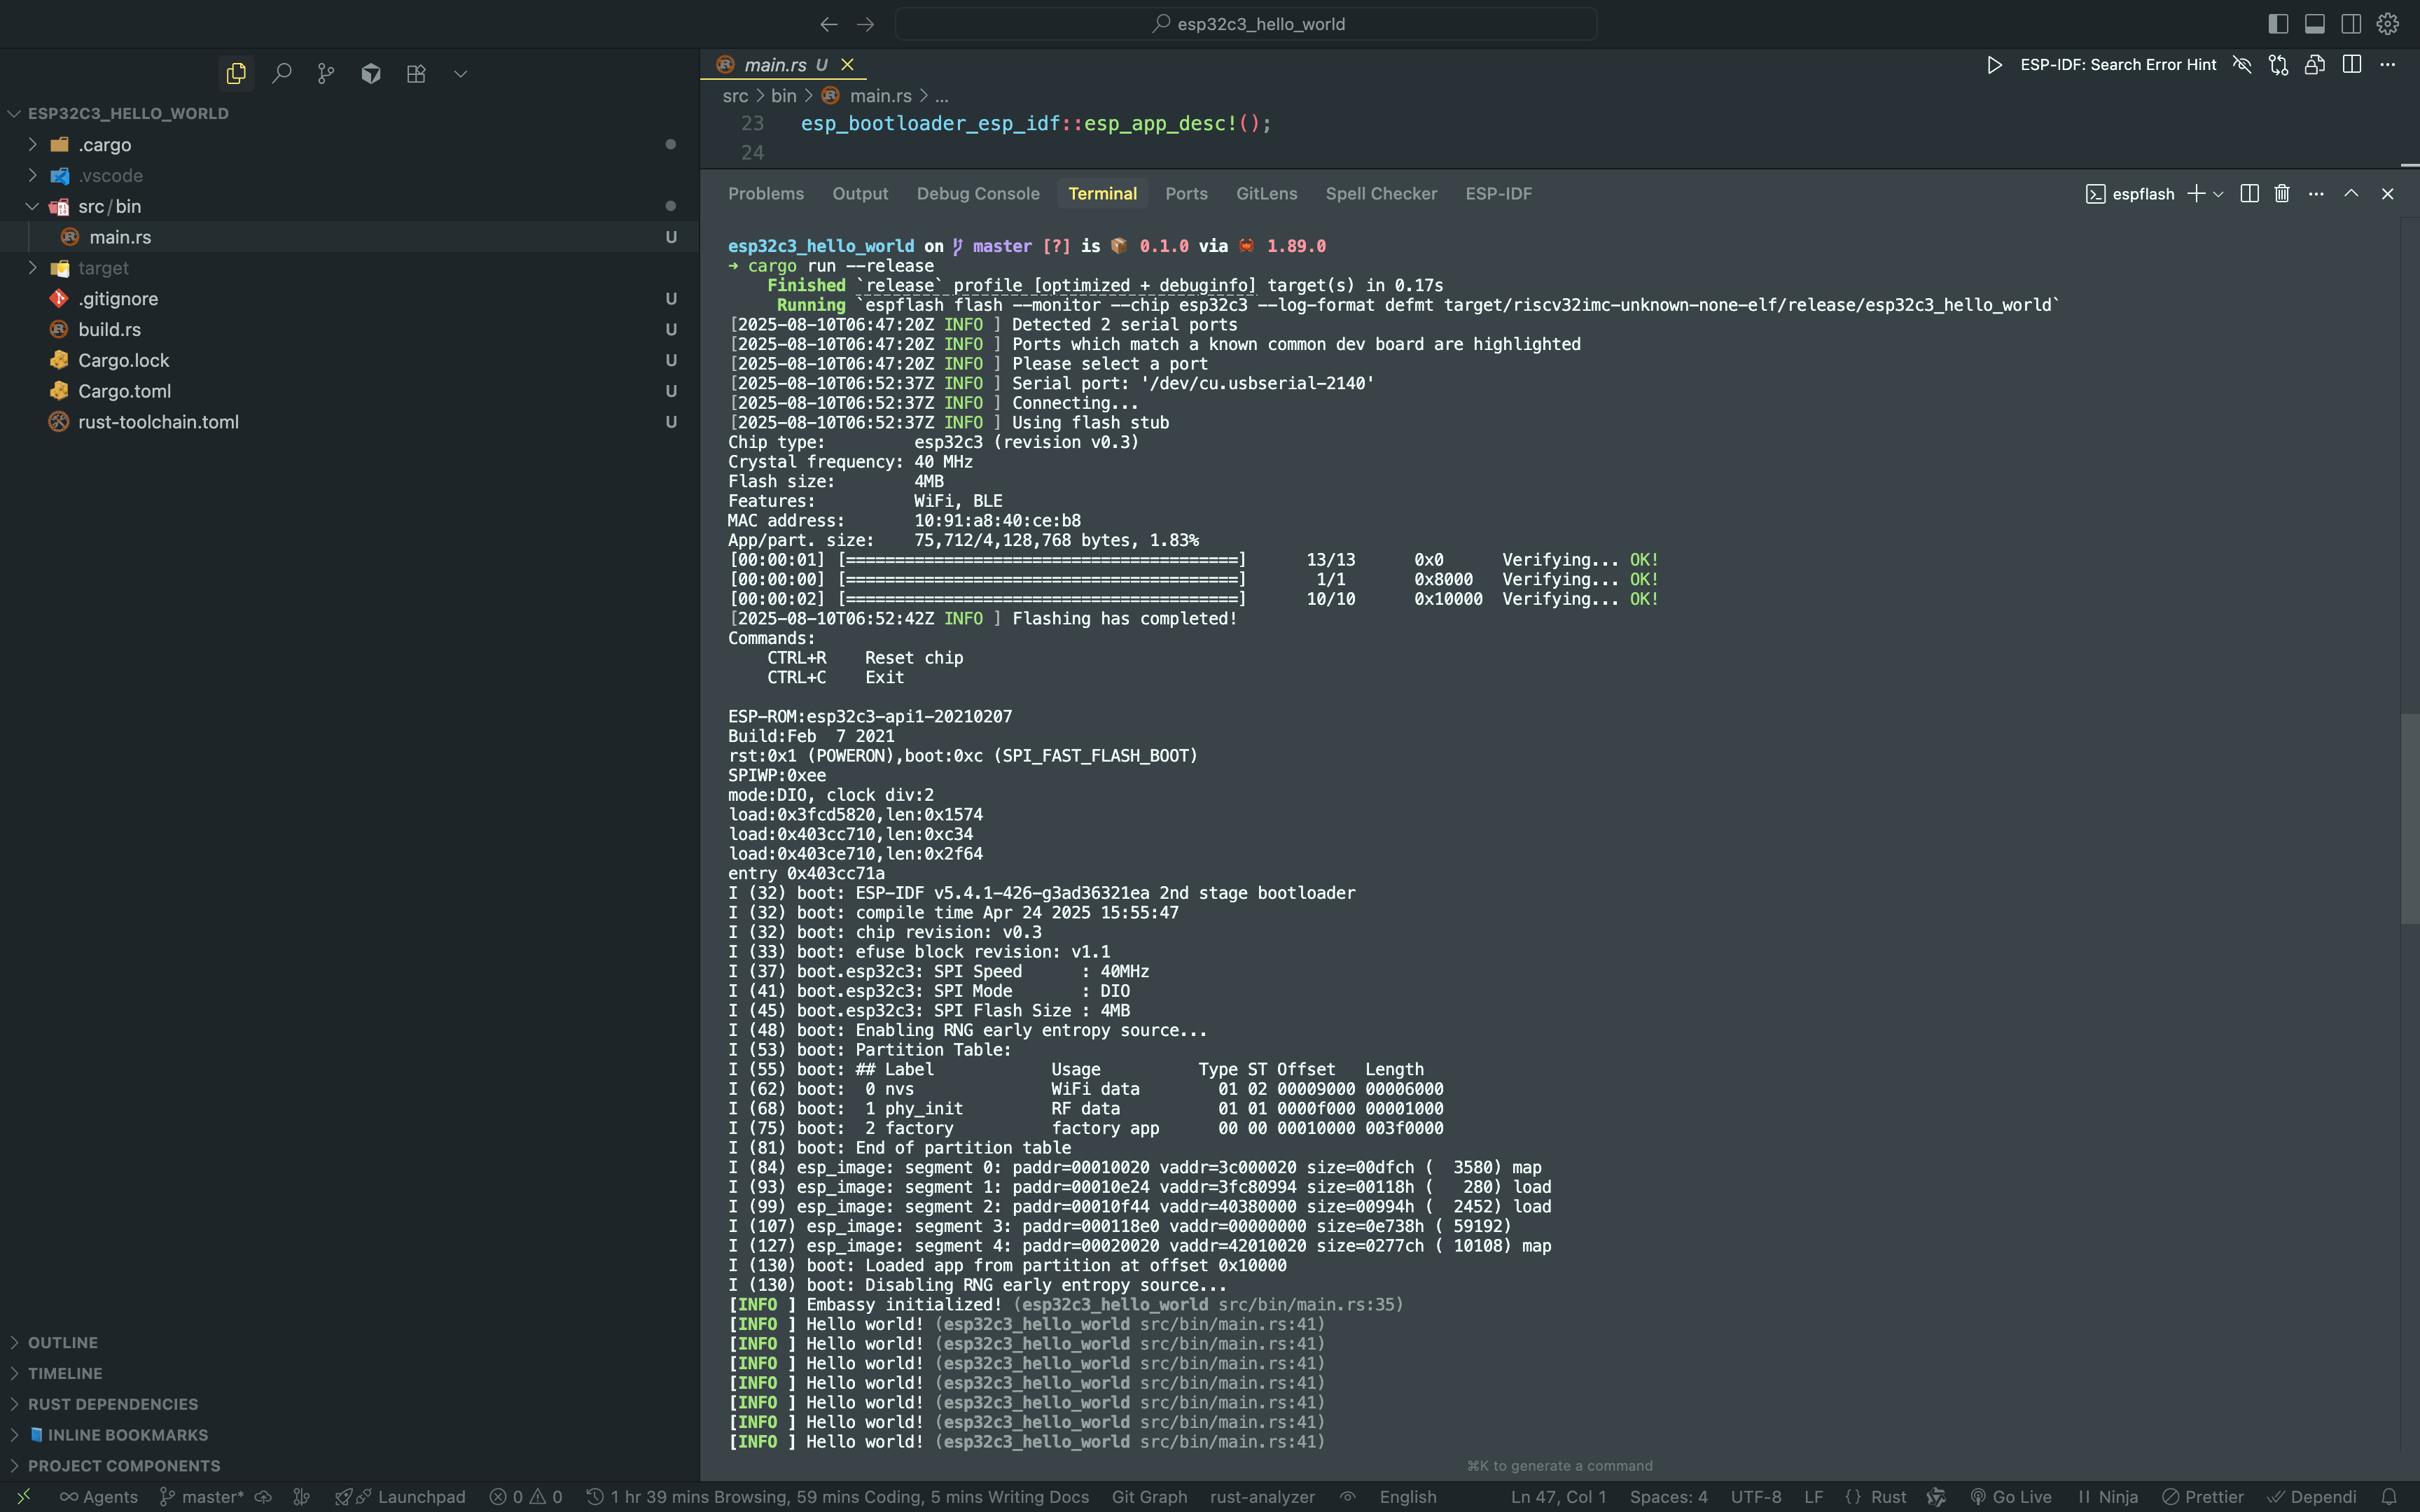
恭喜你!你看到的这个画面,代表你的程序已经成功烧录到ESP32-C3芯片上,并且正在正常运行!
它会一直打印 “Hello world!”,这是一个正常现象。
你看到的终端输出,可以分成两个主要部分:
第一部分:芯片的“开机启动”信息
ESP-ROM:esp32c3-api1-20210207
Build:Feb  7 2021
...
...
I (130) boot: Loaded app from partition at offset 0x10000
I (130) boot: Disabling RNG early entropy source...
最开始的这一大段文字,并不是你的Rust程序打印的。这是ESP32芯片每次通电或重启时,都会运行的**“引导加载程序” (Bootloader)**。
你可以把它想象成电脑开机时的BIOS界面。它的作用是检查硬件、初始化闪存,然后把你的程序从闪存加载到内存里,最后启动你的程序。
第二部分:你的Rust程序的输出
[INFO ] Embassy initialized! (esp32c3_hello_world src/bin/main.rs:35)
[INFO ] Hello world! (esp32c3_hello_world src/bin/main.rs:41)
[INFO ] Hello world! (esp32c3_hello_world src/bin/main.rs:41)
[INFO ] Hello world! (esp32c3_hello_world src/bin/main.rs:41)
... (无限重复)
这部分才是你写的 esp32c3_hello_world 程序真正运行起来之后打印的内容。
Embassy initialized!:这是程序使用的embassy框架在告诉你“我准备好了”。Hello world!:这是你代码里的log::info!("Hello world!");这一行打印出来的信息。
它之所以会一直不停地打印,是因为这个入门示例程序的核心就是一个无限循环 (loop)。它的逻辑是:
- 程序启动。
- 进入一个永远不会结束的循环。
- 在循环里:
- 打印一次“Hello world!”。
- 暂停一小段时间(比如1秒钟)。
- 回到上一步,继续重复。
这种“无限循环”的结构,是绝大多数嵌入式程序(比如你的智能手表、空调、路由器)的基本工作方式,因为它们需要持续不断地通电运行来执行任务。
如何停止它?
espflash 工具在启动监控模式时,已经提示了你控制方法:
- 按
CTRL+C(同时按下 Control 键和 C 键):退出监控模式,程序会停止在你的终端里打印,你会回到命令行提示符状态。但注意,ESP32开发板本身还在继续运行那个程序。 - 按
CTRL+R(同时按下 Control 键和 R 键):重启芯片,但不退出监控。你会看到上面第一部分的“开机启动”信息再跑一遍,然后你的程序又从头开始打印“Hello world!”。
你已经成功地走完了从编译、烧录到运行监控的全过程,非常棒!
总结
本文以参与“Learning Rust Camp S2”训练营为背景,系统性地走过了在macOS上配置嵌入式Rust开发环境并点亮ESP32-C3开发板的全流程。
整个过程可以分为两大阶段:
- 软件环境搭建阶段:此阶段相对顺利,我们依次安装了Rust语言环境、Espressif官方的Rust工具链管理器
espup,以及一系列高效的开发辅助工具,如espflash、probe-rs-tools和项目生成器esp-generate。文章记录了在安装espup时因GitHub API限制遇到的401 Unauthorized错误,并通过配置GITHUB_TOKEN环境变量成功解决。最终,我们顺利生成了hello_world项目模板并完成了初步编译。 - 硬件连接与故障排查阶段:这是本文的核心价值所在。在尝试烧录程序时,我们遇到了经典的
espflash::no_serial错误,即系统无法检测到开发板。随后的排查过程一波三折,我们系统性地验证了以下方面:
-
串口设备检查 (
ls /dev/tty.\*):确认设备未被系统识别。 -
驱动程序安装与验证 (
systemextensionsctl list):确认了Silicon Labs CP210x驱动已正确安装并被系统激活。 -
底层硬件扫描 (
system_profiler SPUSBDataType):做出了决定性的诊断——即时驱动已激活,macOS在最基础的硬件层面上依然看不到设备。
通过这一系列由软件到硬件、由表及里的严谨排查,最终将问题锁定在物理连接层面。通过更换一根高质量的Micro-USB数据线,问题迎刃而解,成功实现了程序的烧录与运行。
这次经历深刻地揭示了嵌入式开发中的一个重要原则:当软件层面的检查都无懈可击时,必须回归物理世界,一个看似不起眼的硬件(如数据线)很可能就是问题的根源。 本文的完整记录,希望能为遇到类似问题的开发者提供一条清晰、有效的排查思路,从而节省宝贵的时间。
参考
- https://github.com/second-state/echokit_box
- https://opencamp.cn/Rust/camp/S02
- https://echokit.dev/
- https://opencamp.cn/Rust/bbs/2
- https://github.com/second-state/echokit_server
- https://www.rust-lang.org/
- https://narukara.github.io/rust-on-esp-book-zh-cn/
- https://narukara.github.io/rust-on-esp-book-zh-cn/installation/riscv-and-xtensa.html
- https://github.com/second-state/echokit_box/blob/main/init.sh
- https://www.yuque.com/u57134292/egxyzp/po266fgf8euz9yi0?singleDoc# 《00_搭建开发环境》
- https://narukara.github.io/rust-on-esp-book-zh-cn/writing-your-own-application/generate-project/esp-generate.html
- https://probe.rs/docs/getting-started/installation/
- https://docs.espressif.com/projects/esp-dev-kits/zh_CN/latest/esp32c3/esp32-c3-devkitm-1/user_guide.html
- https://docs.espressif.com/projects/esp-idf/zh_CN/latest/esp32c3/get-started/index.html
- https://dl.espressif.com/dl/schematics/SCH_ESP32-C3-DEVKITM-1_V1_20200915A.pdf
- https://github.com/DuRuofu/ESP32-Guide
- https://idf.espressif.com/zh-cn/index.html
- https://docs.espressif.com/projects/esp-idf/zh_CN/stable/esp32c3/index.html#esp-idf